What to Consider Before Installing a Small Wash Basin
Installing a wash basin in a compact bathroom requires careful planning to ensure the fixture fits comfortably and functions properly. Limited floor space, existing plumbing connections, door clearance, and storage needs can all influence the final installation. Taking time to evaluate these details before starting the project can help prevent costly adjustments and improve the bathroom’s overall usability.
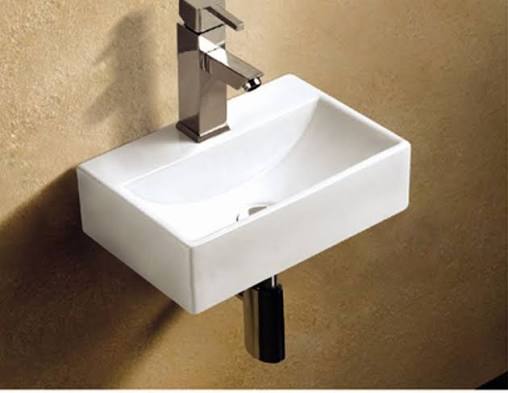
When selecting a Small Wash Basin for a limited space, homeowners should consider its dimensions, mounting method, material, faucet compatibility, and maintenance requirements. A suitable basin should provide comfortable handwashing while complementing the room’s layout and making efficient use of the available space.
1. Measure the Available Installation Area
Accurate measurements are the foundation of a successful basin installation. Even a compact model can create problems if it extends too far into the walkway or interferes with nearby fixtures.
Measure the available width, depth, and height of the proposed installation area. Consider the distance between the basin, toilet, shower enclosure, cabinets, and door. These measurements will help you determine which basin designs are suitable for the room.
Check Clearance Around the Basin
The basin should allow enough space for users to stand comfortably and wash their hands without bumping into surrounding fixtures. Also check whether the bathroom door can open fully without hitting the basin or faucet.
Do not rely solely on the basin’s width. Its projection from the wall and the position of the faucet can have a significant effect on the usable space.
2. Choose the Right Basin Installation Style
The installation method affects the basin’s appearance, storage potential, plumbing access, and space requirements. Comparing the available options helps you choose a model that suits the bathroom layout.
Wall-Mounted Basins
Wall-mounted basins attach directly to the wall and leave the floor underneath open. This arrangement can make a small bathroom feel less crowded and simplify floor cleaning.
However, the wall must provide suitable support, and the mounting hardware must be compatible with the basin. Plumbing connections should also be positioned according to the manufacturer’s instructions.
Countertop Basins
Countertop basins sit on a vanity or worktop and can provide an attractive focal point. They are suitable when you want to combine a decorative basin with storage or additional surface space.
Before installation, check the total height of the countertop and bowl. The vanity should also provide enough support and leave sufficient room around the basin for everyday use.
Corner Basins
Corner basins can make use of an otherwise underutilized area. They are particularly useful in narrow guest toilets and powder rooms where a conventional basin might obstruct movement.
Measure both adjoining walls and confirm that the faucet and drain can be installed conveniently before selecting a corner model.
Pedestal and Vanity Basins
Pedestal basins conceal some plumbing connections while maintaining a traditional appearance. Vanity basins offer the additional benefit of enclosed storage.
Both styles can work in compact bathrooms, but their total footprint should be compared with the available floor area before installation.
3. Check the Existing Plumbing Connections
Plumbing compatibility is one of the most important considerations before installing a new basin. The position of the water supply pipes and drainage outlet can determine how easily the selected model can be fitted.
Inspect the existing connections and compare them with the basin’s installation specifications. Check the waste outlet size, faucet connection requirements, and available space for the trap and drainpipe.
Plan for Necessary Modifications
If the new basin requires different pipe positions, additional fittings, or changes to the drainage system, include these requirements in your installation plan.
Avoid forcing pipes into position or using unsuitable connectors to make incompatible components fit. A qualified plumber can assess the existing arrangement and recommend appropriate modifications.
Planning plumbing work in advance can reduce delays and help prevent leaks after installation.
4. Select a Compatible Faucet
The faucet should match the basin’s design, mounting arrangement, and bowl dimensions. An unsuitable faucet may create excessive splashing, make handwashing uncomfortable, or interfere with the available countertop space.
Determine whether the basin supports a deck-mounted faucet, wall-mounted faucet, or a specific number of faucet holes. Check the spout’s height, reach, and angle before purchasing the components.
Consider Water Flow and Splashing
The faucet should direct water into the usable area of the bowl rather than onto the rim or surrounding countertop. A shallow basin may require particularly careful faucet selection to control splashing.
Water-efficient faucets can also help reduce unnecessary water consumption. Choose a product with a suitable flow rate and reliable controls that are easy to operate.
5. Evaluate the Basin’s Material and Durability
The basin material affects its appearance, cleaning requirements, resistance to everyday wear, and long-term maintenance needs. Choose a material that suits the bathroom’s level of use and your preferred cleaning routine.
Compare Common Materials
- Ceramic: Offers a smooth surface and straightforward routine cleaning, making it a popular choice for many bathrooms.
- Porcelain: Provides a refined finish and generally requires relatively simple maintenance.
- Solid surface: Supports contemporary designs and streamlined shapes, although care requirements depend on the specific product.
- Glass: Creates a modern appearance but may show fingerprints and water spots more readily.
- Natural stone: Provides distinctive patterns and textures but may require specialized cleaners or periodic sealing.
Review the manufacturer’s care instructions before making a decision. The right material should complement the interior while remaining practical for everyday use.
6. Confirm That the Wall or Countertop Can Support the Basin
The supporting structure must be appropriate for the basin’s weight and installation method. This is particularly important for wall-mounted models, which depend on secure brackets, anchors, or a suitable support frame.
Before drilling or attaching the basin, identify the wall construction and confirm the recommended fixing method. Do not assume that every wall can safely support a basin using standard screws alone.
Prepare the Mounting Surface
For countertop basins, check that the worktop is stable, level, and compatible with the required cutouts and fittings. Ensure that the cabinet can support the combined weight of the basin, faucet, and expected use.
Follow the manufacturer’s mounting instructions and use suitable hardware. If the supporting structure needs reinforcement, arrange this before installing the fixture.
7. Plan Drainage and Trap Installation
A properly installed drainage system allows wastewater to flow away efficiently and helps prevent unpleasant odors from entering the bathroom.
Check that the drain assembly matches the basin’s outlet and that the pipework can be connected without unnecessary bends or awkward alignment. The trap should be installed correctly to maintain its water seal.
Avoid Common Drainage Problems
Poor alignment, unsuitable fittings, or incorrect pipe gradients can contribute to slow drainage and leaks. Ensure that all connections are secure and that the waste pipe follows applicable plumbing requirements.
After installation, run water through the basin and check that it drains properly. Inspect the drain, trap, and surrounding connections for leaks before placing stored items beneath the fixture.
8. Decide Whether Additional Storage Is Needed
A small basin can save space, but the surrounding area should still accommodate essential bathroom items. Soap, hand towels, toiletries, and cleaning supplies need practical storage without crowding the washing area.
A compact vanity may provide drawers or a cabinet, while a wall-mounted basin can be paired with a narrow shelf or mirrored cabinet.
Make Use of Vertical Space
When floor space is limited, consider storage that uses the walls rather than extending into the walkway.
Choose shelves and cabinets that do not obstruct the faucet, mirror, or comfortable access to the basin. Keep frequently used items within easy reach and avoid overcrowding the countertop.
9. Consider Water Protection and Sealing
Water can enter gaps around the basin, countertop, or wall connections if the installation is not sealed correctly. Over time, this moisture may damage cabinetry, wall finishes, or other nearby materials.
Use the sealant and sealing method recommended for the basin and installation surface. Follow the manufacturer’s instructions for preparing the surface, applying the sealant, and allowing it to cure before use.
Inspect Seals Regularly
Check the edges around the basin for cracks, gaps, or signs of deterioration. Replace damaged sealant when necessary, but first identify and address any underlying leaks.
Do not rely on sealant to compensate for an unstable basin, incorrectly aligned plumbing, or damaged mounting hardware. These problems require proper repairs rather than cosmetic fixes.
10. Plan Electrical Safety and Lighting
Lighting is important when installing a basin because users need clear visibility around the faucet, mirror, and washing area. Poor lighting can create shadows and make everyday tasks less convenient.
Consider the position of existing lights and whether additional mirror lighting would improve visibility. If new electrical fittings are required, ensure that they are suitable for the bathroom location and comply with applicable electrical safety regulations.
Keep Electrical Fixtures Appropriate for Wet Areas
Electrical equipment should be installed with the correct protection for its location and exposure to moisture. Avoid placing unsuitable sockets, switches, or lighting fixtures close to water sources.
Use a qualified electrician for new wiring or electrical modifications. Planning lighting and electrical requirements alongside the basin installation can help prevent later disruption.
11. Set a Realistic Installation Budget
The cost of installing a basin includes more than the purchase price. Additional expenses may include the faucet, drain assembly, trap, mounting hardware, sealant, plumbing modifications, countertop work, and professional labor.
The installation style can influence the total cost. A basin that fits the existing plumbing may require less work than one that needs new pipe positions or structural modifications.
Compare the Complete Cost
Before purchasing, confirm which accessories are included and which must be bought separately. Check the warranty, availability of replacement parts, and any special installation requirements.
Obtaining an installation estimate in advance can help you compare different models more accurately and avoid unexpected expenses.
12. Test the Basin After Installation
Once the basin has been installed, perform a careful inspection before considering the project complete. Testing helps identify connection problems while they are still relatively easy to correct.
Run the faucet at different flow levels and observe how the water enters the bowl. Confirm that the basin drains smoothly and that the faucet controls work correctly.
Complete These Final Checks
- Inspect the faucet connections for leaks.
- Check the drain assembly and trap.
- Confirm that the basin is secure and level.
- Look for gaps or defects in the sealing.
- Verify that the door and nearby fixtures have adequate clearance.
- Check for excessive splashing during normal use.
- Ensure that the basin and surrounding surfaces are easy to clean.
If you notice movement, persistent leaks, or drainage problems, address them before regular use. Serious installation issues should be assessed by a qualified professional.
Conclusion
Installing a small wash basin successfully requires careful attention to measurements, plumbing, mounting support, faucet compatibility, and water protection. Choosing the right installation style can help maximize floor space, while suitable materials and practical storage solutions improve everyday convenience.
Before beginning the project, assess the bathroom layout, confirm the existing plumbing arrangement, and calculate the complete installation cost. Follow the manufacturer’s instructions and seek professional assistance for complex plumbing, structural, or electrical work. With proper planning and installation, a compact basin can provide reliable performance while helping maintain a functional and attractive bathroom.